For me, the choice of a good pair of knives is among the most important decisions to be made in the process of building up your kitchen. I use my knives for at least two meals a day, 7 days a week. It is worth being picky and getting the best you can afford. I'm going to give general guidance here, as I haven't had enough experience with all of the premium brands to be able to give sensible advice (I have a budget too, unfortunately). If you follow these guidelines and stick to brands with a good reputation, I think you'll be in good shape.
The first thing you need to know is that for almost all kitchen work, you only need two knives: an 8-10 inch chef's knife and a 3-4 inch paring knife. Most people (myself included) start out by buying one of those nice wooden blocks with all of the knives poking out, and then proceed to never use all but those two. I'm not saying that you will never have a use for those other knives, but the cases are very rare where you can't do nearly as well with either a chef's or paring knife. If you start out with just those two, you can spend the money on quality instead of quantity, and I guarantee you will be happier in the long run. So, rule number one is:
Don't be enticed by the "knife assortments" -- start with just a chef's knife and a paring knife, and buy them separately.
 |
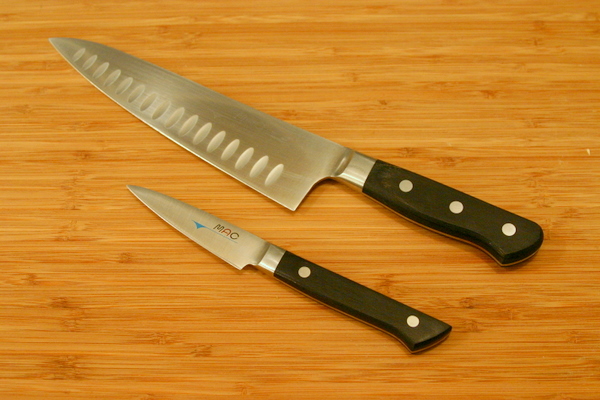
| My best knife -- this is a MAC chef's knife. It should have writing on the blade, but I use it so much that the writing has worn off. |
Of the two knives you need, by far the most important is the chef's knife. There are several subtleties to the selection of a chef's knife that can make the difference between a lifetime of happy use and a series frustrating limitations. Every surface of a chef's knife is used in the kitchen -- the edge, the flats, and the back are all important. It is also important to get a knife with a comfortable handle, though in my experience any of the higher quality knives seems to be fine in this respect. I'll split up the chef's knife recommendations into three sections: edge, flat, and back.
The cutting edge of the chef's knife is obviously the most important part to look at from a use perspective. It should be gracefully curved from tip to handle. There should be no serrations or nicks anywhere along it's length. You can check this by holding the knife edge upwards pointed at a light -- look for bright spots on the edge. If there are some big ones, the edge is not well ground and you'll have to get it sharpened by a pro before it'll perform to its best potential. The cutting edge should also be double beveled, and centered in the body of the metal. Some knives are ground only on one side (single bevel). If your knife's edge looks the same on both sides, it's double beveled. I'm sure there are people who have good reason to prefer single bevels, but for me it makes bigger cuts wander because of the uneven pressure on the blade. Look at the knife edge-on and make sure that the cutting edge is centered and doesn't wander back and forth. If it's not centered or it wanders, you will end up with a knife with a hollow spot in the edge after sharpening for a while, and you won't be able to cut well against the cutting board with it.
The final point to mention is that the shape of the knife is important. The blade is designed so that you can hold the edge against the cutting board without your knuckles getting in the way on the handle:
 |
| With the edge flat on the cutting board, there is room for my knuckles under the handle. |
I haven't seen a chef's knife yet that failed here, but this is a basic requirement and it is worth being aware of. Without this, you will not be able to use your knife effectively. In summary:
The cutting edge should be smoothly curved, centered, double beveled, free of nicks, and not serrated. Make sure there is room for your knuckles on the handle with the edge against the cutting board.
The back of the knife is much less used than the edge, but it is still worth selecting a knife with a good back because it will save you a lot of time mincing garlic, ginger, and other such things. To mince garlic, use your knife's back like you normally would the edge, and "slice" off about 1/8 inch "slices" of the garlic. The result will be instantly minced garlic, and no need to wash the garlic press. This trick also works for many other things when you want a fine mince/crush. To enable this use, the back of the knife should be ground square, not rounded over. Like the edge, it should curve in one continuous sweep from tip to handle. Unlike the edge, the back should meet the handle seamlessly, so you can run a finger uninterrupted from the tip all the way to the butt of the handle. A slight bump or other small feature is not a big deal, but make sure there is no big offset here. Rock the knife back and forth on a flat surface along the back, with the handle sticking out past the edge so it doesn't get in the way. With the handle sticking off of the edge, the knife should roll smoothly from tip to handle with no clunks or other unevenness. If it clunks, that means the back is concave and will not work for the above use. You can also hold it against a surface with a light background to see if there is more than one point of contact. You can see in the picture that my best knife actually has this problem:
 |
| This knife, while superior in other respects, does not have a functional back. Note the two points of contact where the back meets the cutting board. |
Because of that I actually keep my old knife around just for mincing garlic and other things. Don't treat the back as if it's as important as the edge, but if a choice arises between to otherwise equivalent knives, pick the one with the functional back.
The back of the knife should be smoothly convex from tip to handle, ground square, and flush with the handle.
The flats of the blade are used when you want a coarser mince for garlic or other similar items. You simply crush the garlic under the flat of the knife so it is flattened, then chop it up with the edge to obtain the coarse mince. The only really important thing for this use is to make sure that the blade is rigid enough to withstand the force of crushing garlic. Any high quality knife should fit the bill, but if you are looking at the lower end selection, make sure the blade is good and stiff. Some knives have a thickened ridge along the back -- avoid this. It's meant to stiffen the knife, but it makes the flat much less usable.
The knife should be rigid enough to withstand the forces of crushing garlic and similar things under the flat. Avoid knives with ridges along the back.
Finally, the handle of the knife is very important. When you hold the knife for most uses, you will be using the pinch grip. With this grip, you are pinching the blade of the knife between thumb and forefinger just above the handle, and gripping the handle with the remaining fingers. This gives maximum control over the angle of the blade while cutting. For this reason, choose a knife that has a smooth transition from handle to blade. You don't want any "hand guards" or other protrusions getting in the way of your primary knife grip. Also, I would avoid the knives that have a thick area on the part of the blade that hangs down just next to the handle (Wusthof knives frequently do this). It would interfere with my grip on the knife, and I would consequently have less control and speed. If you click on the link for "pinch grip" you will see a knife with this feature being held in a pinch grip, so it is clearly possible. I just think it's uncomfortable. One other thing to note about this design is that the most efficient way I've found to pop the bad eyes out of potatoes and to cut the greens off of strawberries requires that the cutting edge of the knife be sharp all the way to the corner. Using this trick (which I'll cover in the knife skills post), I can process strawberries in less than a second each, which is several times faster than the next best thing I've tried.
The handle should flow smoothly into the blade, and I would avoid knives with thick spots on the lower part of the blade where it joins the handle. Make sure you can comfortably hold the knife in a pinch grip.
If you can find a good quality knife that meets all of those guidelines, I believe you will have found a lifelong partner in the kitchen that will serve you and possibly your descendants very well.
 |
| My paring knife. This is a relatively new addition to my kitchen -- you can tell because the writing is still visible on the blade! |
The Paring Knife
The paring knife is not used as extensively as the chef's knife in my kitchen, but it is still a very important knife for boning meat, peeling stuff (though I generally use a vegetable peeler), and other cutting tasks of a more precise nature. There are not as many criteria for the selection of a paring knife; you need only worry about the edge and the handle.
The edge of a paring knife should be three to four inches in length. Some are as long as five inches, but I think that's getting a little long for my uses of the knife. Like the chef's knife, the edge should be double beveled, smoothly curved, and centered in the metal. I would recommend against a serrated knife, as I think they are useless for peeling.
The paring knife blade should be three to four inches in length, and the edge should be smoothly swept from tip to handle, double beveled, free of nicks, non-serrated, and centered in the metal.
The handle of the knife should be comfortable to hold in a crush grip. This means that you have all four fingers wrapped around the handle and are "crushing" it in your hand. In reality, this is the most natural way to hold the knife for most people, so just make sure you can comfortably hold the knife -- no sharp corners or other protrusions that interfere with holding it at different angles, etc.
The handle should be comfortable in the hand when held in multiple angles, and should be free of sharp corners or inconvenient bumps.
No comments:
Post a Comment